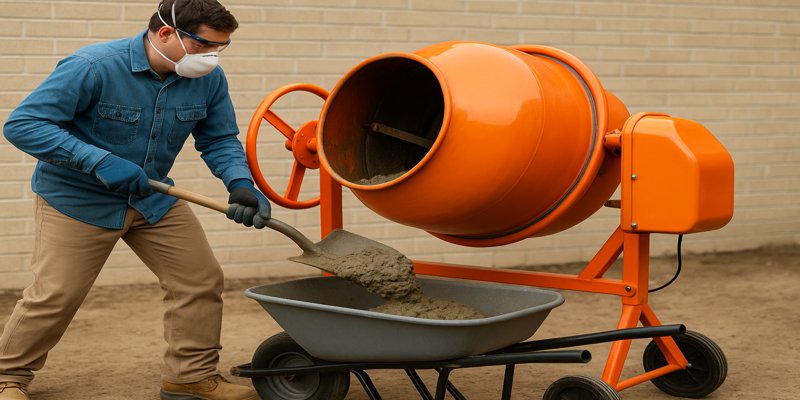
Portable cement mixers have become an essential tool for contractors, landscapers, DIY enthusiasts, and anyone working on small-to-medium-scale concrete projects. Whether you’re building a garden path, laying a patio, or repairing a driveway, a portable mixer allows you to prepare fresh, consistent concrete on-site without the backbreaking labor of mixing by hand.
However, like any piece of equipment, a cement mixer must be handled correctly to ensure safety and efficiency. Mishandling can result in poor-quality mixes, equipment damage, or serious injury.
Basics of a Portable Cement Mixer
Before using a portable cement mixer, you should first understand its parts and how the machine operates.
Key Parts of a Portable Cement Mixer:
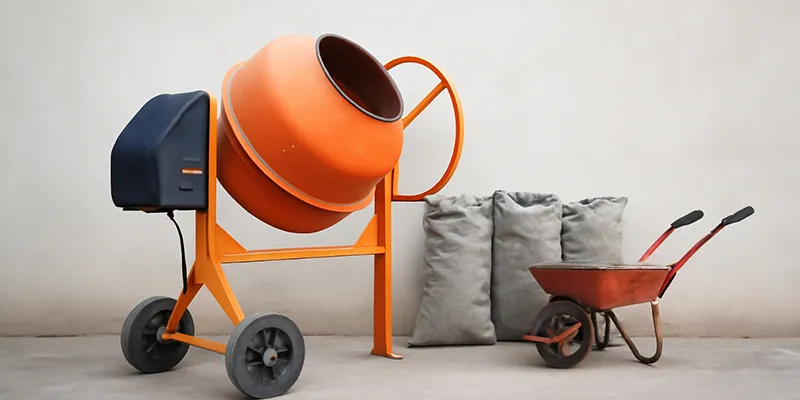
- Drum: The rotating container where cement, water, and aggregates are mixed.
- Motor: Powers the drum rotation; may be electric, petrol, or diesel.
- Frame/Stand: Supports the drum and houses the motor.
- Controls: Power switch, speed settings, or tilt handle for drum positioning.
- Safety Guard: Covers moving or electrical components to prevent injury.
- Wheels: For portability on job sites.
Common Types of Portable Cement Mixers:
- Electric mixers: Ideal for home projects; lighter and quieter.
- Petrol/diesel mixers: Ideal for use in areas without access to electricity.
- Towable mixers: Larger capacity, often used for medium-scale construction jobs.
Key Safety Checks Before Starting
Your safety must always come first. Even experienced users should follow safety protocols.
Personal Protective Equipment (PPE):
- Safety glasses or goggles – protect your eyes against splashes of wet cement.
- Dust mask or respirator – avoid breathing in tiny cement particles.
- Protective gloves – guard hands against cement’s caustic effects.
- Steel-toed boots –shield feet from large objects like falling equipment.
- Long-sleeved clothing and trousers – minimize direct skin contact.
Work Area Preparation:
- Ensure the ground is flat, level, and stable.
- Have good ventilation if working indoors.
- Position the mixer away from flammable materials.
Electrical Safety:
- For electric mixers, plug into a Ground Fault Circuit Interrupter (GFCI) outlet.
- Inspect power cords for cuts or fraying.
- Keep cords away from water and sharp edges.
Preparing the Portable Cement Mixer
Step 1: Inspect the Equipment
- Check the drum interior for hardened cement residue and clean if necessary.
- Make sure the tilt handle and locking mechanism function properly.
- Confirm the motor housing is intact and bolts are tight.
- Ensure the mixing paddles inside the drum are not bent or damaged.
Step 2: Position the Mixer
- Place the mixer on a stable, level surface.
- If using a towable mixer, engage the wheel chocks before operation.
- Position it close to your water source and cement storage for efficiency.
Loading the Cement Mixer
General Mixing Ratio for Concrete:
A typical ratio for general-purpose concrete includes:
- 1 part cement
- 2 parts sand
- 3 parts gravel/aggregate
- 0.5 part water (adjust as needed)
Step-by-Step Loading:
- Add half the water first – This prevents dry cement from sticking to the drum walls.
- Add gravel/aggregate – The heavier particles help scrape the drum clean.
- Add sand – This fills gaps between aggregates.
- Add cement – Always pour slowly to reduce dust.
- Add remaining water gradually – Adjust for desired consistency.
Safety Tip: Never overload the mixer beyond its stated capacity. Overfilling can cause poor mixing and strain the motor.
Mixing the Concrete
Step 1: Start the Mixer
Switch the mixer on before adding final water to ensure even distribution.
Allow the drum to reach full rotation speed.
Step 2: Mixing Duration
Mix for 3–5 minutes until the concrete is uniform in texture.
Avoid over-mixing as it can cause premature setting.
Step 3: Adjust Consistency
For pourable concrete, aim for a smooth, slightly runny consistency.
For structural concrete, keep it thicker for strength.
Safety Note: Do not put your hands or any tools within the whirling drum. Use a shovel or hoe only when the mixer is turned off.
Discharging the Mix
Step 1: Tilt the Drum
Use the tilt handle slowly to control the flow.
Avoid sudden tilting, which can cause splashing or spills.
Step 2: Transfer Mix into Wheelbarrow or Molds
Make sure the receiving container is secure and steady.
Use a helper if handling large batches to avoid strain.
Step 3: Maintain Balance
Keep your footing secure, especially if working on uneven ground.
Cleaning the Cement Mixer
Cleaning right after use stops concrete from hardening and building up.
Cleaning Steps:
- Add water to the drum with a few shovels of gravel.
- Run the mixer for 3–4 minutes to loosen residue.
- Tilt and drain the dirty water.
- Rinse thoroughly with clean water.
For tough residue, use a plastic or wooden scraper, and avoid metal tools that might scratch or damage the drum.
Safety Tip: Always disconnect the power before cleaning.
Common Mistakes to Avoid
Adding all the water first – can cause splashing and uneven mix.
Ignoring PPE – increases risk of skin burns and respiratory issues.
Overfilling – reduces efficiency and can damage the mixer.
Neglecting cleaning – hardened concrete can permanently damage the drum.
Leaving mixer running unattended – increases the chance of accidents.
Maintenance for Long-Term Safety
Regular maintenance ensures your portable cement mixer remains safe and efficient.
Weekly Maintenance Checklist:
- Inspect the drum for cracks or deformation.
- Look for wear on the wiring and motor.
- Tighten loose bolts or screws.
- Replace worn mixing paddles.
Safety Data Table for Portable Cement Mixer Operation
| Safety Aspect | Recommendation | Potential Risk if Ignored |
| PPE Use | Wear gloves, goggles, dust mask | Skin burns, eye injury, inhalation issues |
| Mixer Placement | Level, stable surface | Tipping over, uneven mixing |
| Electrical Safety | GFCI outlet, check cables | Electric shock, fire |
| Overloading Prevention | Follow capacity limits | Motor burnout, poor mix |
| Cleaning After Use | Immediate cleaning with water and gravel | Permanent drum damage |
Example Project: Mixing for a Patio Slab
Project Specs:
- Slab size: 3m × 3m × 0.1m (thickness)
- Volume needed: 0.9 m³
- Mix ratio: 1:2:3 (cement:sand:aggregate)
Material Quantities:
- Cement: ~0.15 m³ (~12 bags of 25 kg)
- Sand: ~0.30 m³
- Aggregate: ~0.45 m³
- Water: ~135 liters
Mixer Usage:
- Batch size: 0.09 m³ per load
- Number of loads: 10
- Mixing time per load: 5 minutes
Final Safety Reminders
Make sure pets and kids don’t enter the workspace.
After operation, store the mixer in a dry, secure location.
If using petrol/diesel mixers, store fuel safely away from heat sources.
Using a portable cement mixer is an efficient way to produce consistent, high-quality concrete for a variety of projects. However, safety should always take priority over efficiency. By wearing the right PPE, following proper loading and mixing steps, and maintaining your equipment, you can ensure every batch is mixed without incident.
This step-by-step guide gives you a solid foundation for safe operation, whether you’re tackling a small garden project or a larger DIY construction job. Treat your mixer well, and it will serve you reliably for years.