
Concrete is among the most versatile construction materials, yet its performance largely relies on the quality of mixing. Whether you’re building a patio, setting fence posts, or creating a small structure, perfect consistency determines not only the strength but also the workability and finish of your concrete.
For small to medium-scale jobs, a portable concrete mixer offers the flexibility and control needed to achieve professional results. However, the difference between a sturdy, long-lasting slab and a brittle, uneven surface often lies in how you mix the concrete.
Understanding Why Consistency Matters
Before diving into techniques, it’s essential to understand why consistency is so important:
- Structural Strength – Properly mixed concrete achieves its intended compressive strength, ensuring the structure can bear loads.
- Workability – The right consistency makes it easier to pour, shape, and finish without excessive effort.
- Durability – Consistent mixing reduces weak spots that could crack or crumble over time.
- Appearance – Evenly mixed concrete prevents patchy surfaces and uneven color distribution.
In short, a perfect mix equals a perfect outcome. Poorly mixed batches lead to structural weaknesses, aesthetic flaws, and costly repairs.
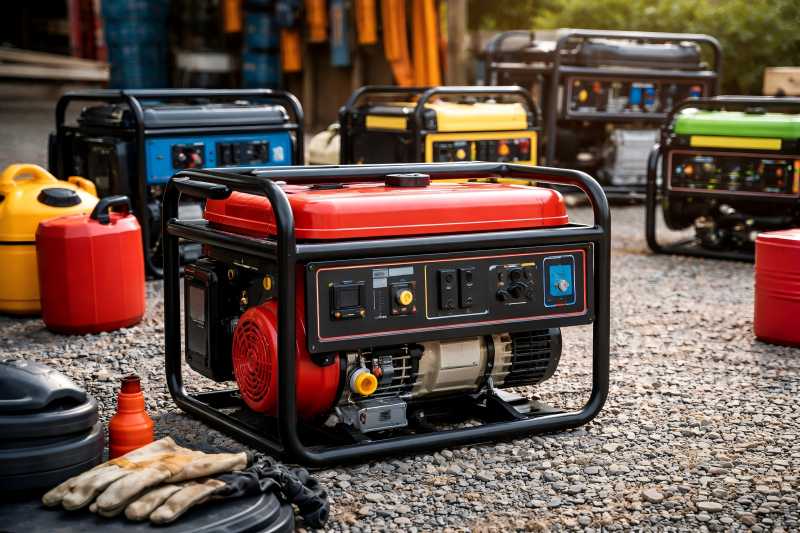
Choosing the Right Portable Concrete Mixer
Not all portable mixers are created equal. The choice you make will determine how easily consistency can be achieved.
Key Considerations
| Feature | Why It Matters |
| Drum Capacity | Match capacity to job size—avoid overfilling. |
| Drum Material | Steel drums are durable; polyethylene drums are lighter and easier to clean. |
| Motor Power | Stronger motors handle heavier, stiffer mixes. |
| Tilt Mechanism | Easier emptying and better mixing control. |
| Portability | Look for wheels, handles, and manageable weight. |
For small construction sites, electric portable mixers are typically preferred due to their lower noise, reduced maintenance, and clean operation.
Preparing Your Tools and Materials
Before starting, ensure you have:
- Portland cement
- Sand (fine aggregate)
- Gravel or crushed stone (coarse aggregate)
- Clean water
- Measuring containers for precise ratios
- Shovel or scoop for loading
- Protective gear: gloves, goggles, dust mask
Preparation is crucial—running around looking for missing items during mixing leads to inconsistent batches.
Determining the Ideal Mix Ratio
The most common standard mix for general-purpose concrete is:
1 part cement : 2 parts sand : 3 parts gravel + water
However, ratios can vary depending on application:
| Application | Ratio (Cement : Sand : Gravel) | Water-Cement Ratio |
| Foundations & Structural | 1:2:3 | 0.4–0.5 |
| Pathways & Driveways | 1:2.5:3.5 | 0.45–0.55 |
| Lightweight/Non-structural | 1:3:4 | 0.5–0.6 |
Tip: Always measure materials by volume or weight—guessing leads to uneven results.
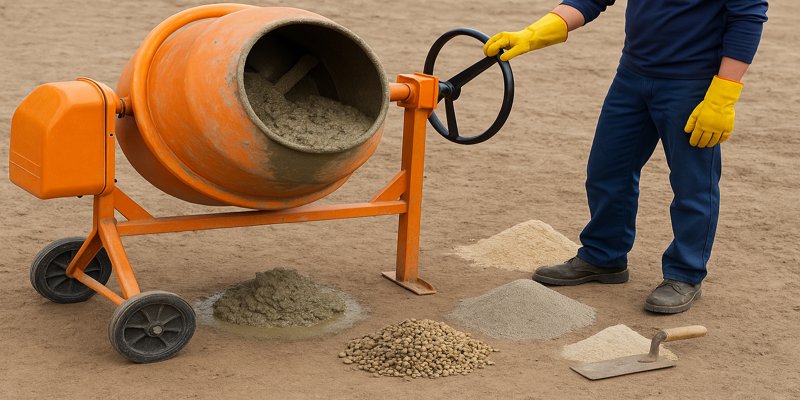
Step-by-Step Mixing Process in a Portable Mixer
Step 1: Position the Mixer
Place the mixer on stable, level ground close to your materials to minimize downtime.
Step 2: Start the Mixer Before Loading
Turn the drum on before adding materials. This prevents sticking and ensures better blending.
Step 3: Add Water First (Partial)
Pour in about two-thirds of the required water. This helps coat the drum and improves initial mixing.
Step 4: Add Gravel
Introduce coarse aggregate first—it helps break up cement clumps later.
Step 5: Add Cement
Slowly pour in the cement while the drum rotates to prevent dust clouds and clumps.
Step 6: Add Sand
Follow with fine aggregate to fill gaps between gravel and bind the mix.
Step 7: Add Remaining Water Gradually
Control the water addition while observing the mix’s texture—this is where you fine-tune consistency.
Step 8: Mix for the Right Duration
Generally, 3–5 minutes is ideal for small batches. Overmixing can lead to water separation, while undermixing leaves dry pockets.
The Science of Water-Cement Ratio
The water-to-cement ratio is the key element in achieving ideal concrete consistency.
Too much water → weaker concrete, surface dusting, and shrinkage cracks.
Too little water → stiff, unworkable mix, poor compaction, and incomplete hydration.
- Ideal w/c ratio: 0.4–0.6 (by weight) depending on the job.
- Example: For 50 kg cement, 20–30 liters of water.
Testing Concrete Consistency
Slump Test
Place fresh concrete into the cone mold in three separate layers.
Compact each layer with a rod to eliminate trapped air.
Raise the cone and check the height of the resulting slump.
- High slump (150–180 mm): Very wet mix.
- Medium slump (75–100 mm): Ideal for most jobs.
- Low slump (25–50 mm): Stiff, suitable for pavements.
Visual and Practical Checks
Shiny but not soupy surface.
Smooth rotation in the drum without clumping or excessive splashing.
Holds shape when piled on a shovel without running off.
Adjusting Consistency During Mixing
If the mix is too dry:
- Add water in small amounts (0.5–1 liter at a time).
- Allow 30 seconds mixing after each addition.
If the mix is too wet:
- Add extra sand and gravel in the correct ratio.
- Avoid adding only cement—it will alter mix proportions.
Common Mistakes to Avoid
Overfilling the Mixer – Reduces efficiency and leads to uneven blending.
Adding All Water at Once – Harder to control consistency.
Ignoring Batch Timing – Overmixing or undermixing weakens the concrete.
Using Dirty Tools or Water – Contaminants affect bonding.
Mixing in Extreme Temperatures – Hot weather speeds up drying; cold slows hydration.
Environmental Factors Affecting Consistency
| Condition | Effect on Mix | Adjustment Needed |
| Hot & Dry | Water evaporates quickly | Use cool water, work in shade, mix smaller batches |
| Cold Weather | Slower hydration, risk of freezing | Use warm water, insulate freshly poured concrete |
| Humid | Slightly slower drying | Minimal adjustments, monitor workability |
Cleaning and Maintenance for Consistent Results
A dirty mixer causes material build-up, altering future batch ratios.
Cleaning Steps:
Run the mixer with water and a few shovels of gravel for 2–3 minutes.
Drain and rinse thoroughly.
For hardened residue, use a rubber mallet and avoid harsh metal tools.
Safety Practices While Mixing
Wear PPE: gloves, safety glasses, dust mask.
Keep clothing fitted and away from moving parts.
Turn off and unplug the mixer before performing maintenance.
Use caution with lifting heavy bags of cement and aggregates.
Troubleshooting Mix Issues
| Problem | Likely Cause | Solution |
| Lumpy mix | Dry pockets in drum | Increase mixing time, add water gradually |
| Weak final concrete | High water content | Reduce water, follow correct w/c ratio |
| Uneven color | Poor mixing sequence | Follow proper loading order |
| Segregation | Overmixing or too wet | Reduce water, shorten mixing duration |
Achieving perfect concrete consistency with a portable mixer is a combination of preparation, precision, and practice. By understanding mix ratios, controlling the water-cement balance, and following a structured mixing process, you can produce concrete that is strong, workable, and durable every time.
A portable mixer gives you the freedom to mix on-site, but it’s your technique that determines the final quality. Treat each batch with care, monitor the texture closely, and keep your equipment clean—and you’ll master the art of consistent, high-quality concrete.