Concrete can blister or delaminate when finishing closes and densifies the surface while air or bleed water is still moving upward beneath it. The trapped material can leave a shallow separation below the finished skin. Power-troweling timing, concrete mixture, weather, and the supporting surface all influence that risk.
A smooth appearance immediately after finishing does not prove that the surface layer is sound. Some defects become apparent only when the floor is walked on or put into service. Understanding how the separation forms is more useful than assuming that every damaged finish needs another trowel pass.
How Are Blisters and Delamination Related?
A blister is a localized raised area with a shallow void underneath its surface skin. Delamination describes a separation that can extend over a larger area of the slab’s upper layer. They share a possible formation mechanism, but their visible size and the way they become noticeable can differ.
The National Ready Mixed Concrete Association’s CIP 13 guidance on concrete blisters describes these low-profile surface features. A small bump may escape notice under flat or poor lighting. Later traffic can break its thin cover and make the defect more obvious.
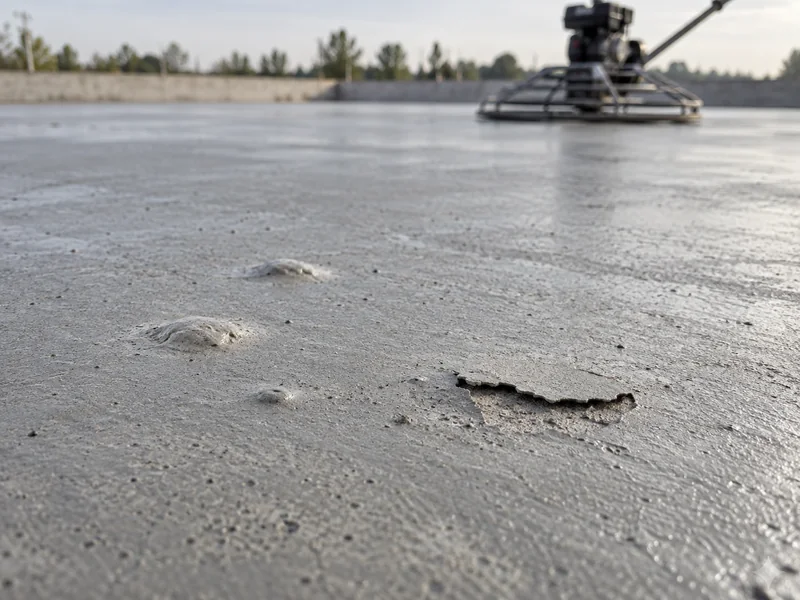
A broad delaminated area may initially look flat instead of visibly swollen. A hollow response or later flaking can prompt further investigation, but those observations alone do not establish the full cause or depth. The terminology should describe what is known without turning a visual impression into a definitive diagnosis.
Why Can a Surface Look Ready Before the Concrete Beneath It Is Ready?
Surface drying and cement hydration are different processes. Wind, sunlight, and dry air can remove surface moisture while the underlying concrete remains plastic. A crust can therefore appear firm enough to finish before the slab has developed a suitable condition through its upper depth.
Temperature differences add another complication. A cooler supporting layer can delay the response of concrete below a surface exposed to warmer conditions. The top and the material underneath do not necessarily progress together.
For example, imagine a slab extending from a shaded bay into direct sunlight. The exposed portion may lose its sheen sooner, even though both areas came from the same delivery. This hypothetical situation illustrates why a single clock time for the entire slab can be misleading.
Does a Dry-Looking Surface Mean Bleeding Has Ended?
Not necessarily: surface evaporation can hide water as it arrives. The absence of a visible puddle does not always establish that upward water movement has stopped. Experienced finishers must consider the mixture, placement conditions, and concrete response together.
NRMCA’s CIP 20 guidance on delamination explains the risk of densifying a surface while the underlying concrete continues releasing air or water. The practical implication is to avoid equating a dry appearance with permission to close the surface. That distinction is central to understanding this defect.
What Does the Power Trowel Change at the Surface?
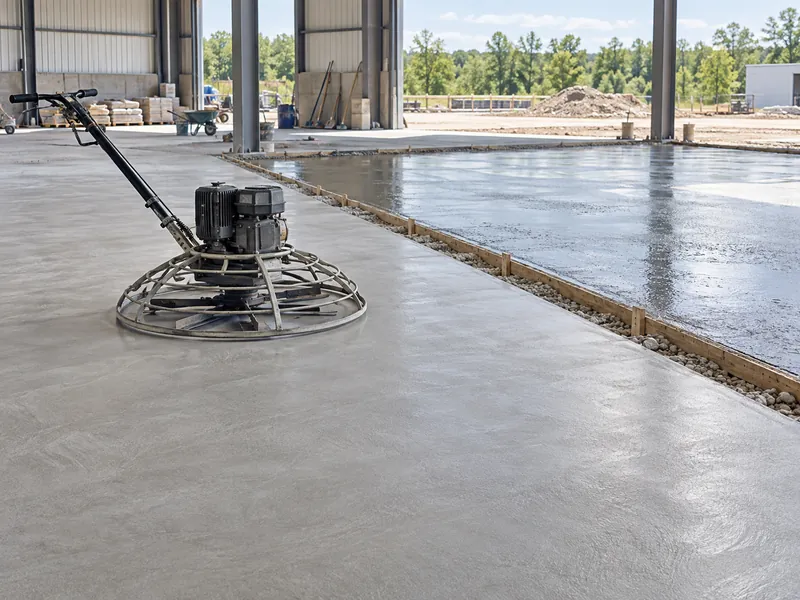
A power trowel applies repeated mechanical action that levels and densifies the upper material. Appropriate timing and settings allow the machine to produce the intended finish. If the operation seals that upper layer too soon, movement from below can become trapped beneath it.
Excalibur’s power trowel range includes walk-behind and ride-on configurations. Both rely on matching the operation to the concrete’s condition. Machine format does not remove the need to distinguish floating from later finishing.
Our article on power trowel blade angle and speed introduces those controls. For a particular pour, the manual and approved finishing method take precedence over a generic angle or speed range. Increasing pitch or speed is not a universal response when the surface resists finishing.
Why Can More Passes Make a Developing Problem Worse?
If a closed skin is already trapping material underneath, additional finishing can further work that same skin without correcting the underlying condition. The immediate appearance may improve while the reason for separation remains. A smoother surface is therefore not always evidence of a better outcome.
Production pressure can make this confusing. An operator may see a blemish and interpret another pass as the fastest way to remove it. The better decision depends on whether the mark is a finishing irregularity, an emerging blister, or something else that needs the supervisor’s attention.
Do not use a fixed pass count as the sole endpoint for every placement. The required finish, concrete response, and approved method determine how the work develops. Our discussion of common power trowel operating mistakes provides related context for avoiding unnecessary surface work.
How Do the Mixture and Slab Support Affect the Finishing Window?
The mix influences setting, bleeding, and the amount and movement of air. Changes in materials or admixtures can change the behavior that a crew became accustomed to on an earlier pour. A familiar machine setting cannot make two different mixtures develop at the same rate.
Air entrainment deserves particular attention where a dense hard-troweled finish is specified. The concrete producer and design team should resolve the required durability and finish together. A finisher should not independently change the air requirement to make finishing easier.
The support beneath the slab can also affect moisture movement and temperature. A specified vapor retarder serves a separate moisture-control purpose and should not be removed or repositioned casually to alter finishing behavior. Resolve the construction method around the designed slab assembly.
| Condition | Why the Surface Can Be Misleading |
| Wind or strong sun | The exposed skin may dry faster than the concrete below it develops |
| Cool support | Concrete near the base may progress differently from the warmer surface |
| Changed mixture | Bleeding and setting can differ from the crew’s previous experience |
| Different exposure across a slab | Adjacent areas may reach finishing stages at different times |
| Repeated early finishing | A polished appearance may conceal a prematurely closed surface |
How Can a Crew Reduce the Chance of Premature Surface Closure?
Coordinate placement and finishing so that the crew can respond to the concrete instead of racing an unrealistic production sequence. Adequate access, lighting, staffing, and equipment availability make that possible. These planning decisions help operators distinguish developing conditions before the next pass.
- Discuss expected concrete behavior and the intended finish before placement begins.
- Account for shaded, sunlit, and wind-exposed portions as potentially different working areas.
- Use the approved measures for managing rapid evaporation without treating them as a substitute for suitable finishing timing.
- Let the concrete’s response guide the transition between floating and finishing.
- Keep the supervisor and concrete producer involved when behavior differs from expectations.
Where a large floor calls for a ride-on power trowel, greater coverage capacity should support the work sequence rather than force an early finishing start. Leaving the trowel idle while the slab develops the required condition can be a deliberate part of managing the pour, even when the equipment is available. The cost of a short delay and the consequences of closing an unsuitable surface are very different.
Should Water or Dry Cement Be Added to Make Finishing Easier?
Do not casually sprinkle water or dry cement over the surface as a finishing shortcut. Such changes alter the local surface material and can introduce additional quality problems. Any specified surface treatment should follow its own approved procedure.
An evaporation-control product, a curing method, and added finishing water are not interchangeable. Each has a different purpose and timing. Use only the product and method suitable for the project, including compatibility with any later floor treatment.
What Should Happen When Blisters Appear During Finishing?
Pause the assumption that more polishing is the answer and involve the responsible supervisor. The appropriate response depends on whether the concrete remains workable and what is causing the surface behavior. Avoid aggressive corrective passes chosen solely to hide the visible bump.
Protect the area from unnecessary traffic while the response is decided. Any adjustment to finishing technique should come from a qualified person familiar with the actual placement. A generic article cannot determine a repair sequence from the word “blister” alone.
For hardened concrete, establish the extent and condition of the affected layer before choosing a repair. Grinding, patching, overlays, and replacement have different purposes and preparation requirements. Applying a coating over an unsound layer does not automatically restore its attachment to the slab.
Can Later Polishing or Curing Reverse a Delamination?
Later polishing changes the exposed surface; it does not by itself reconnect a separated layer. Our explanation of power-troweled and polished concrete distinguishes the two processes. A repair plan must address the substrate that the later finish will depend on.
Correct curing remains necessary for the concrete’s subsequent development, but it should not be presented as a cure for an already formed separation. Finishing timing and curing each serve their own role. Completing one stage properly does not erase a defect introduced during another.
The most useful lesson is to separate appearance from the physical condition beneath it. A power trowel can make a surface look closed before the concrete is ready for that closure. Coordinating the mixture, environment, and finishing sequence gives the crew a better basis for avoiding blisters and delamination than chasing shine or counting passes.