For long-lasting and visually stunning patios, driveways, walks, and outdoor living areas, pavers are a popular choice. However, to ensure their long-term stability and professional appearance, proper installation techniques are crucial, particularly compaction. Using a plate compactor effectively during the paver installation process ensures a stable, even surface that resists shifting and sinking over time.
As a plate compactor manufacturer, we understand the critical role this piece of equipment plays in hardscaping projects.
Why Compaction Is Crucial in Paver Installation
It’s crucial to comprehend the function of compaction in paver installation before beginning the steps:
- Increases load-bearing capacity of the soil and base
- Stops uneven settling or paver moving over time.
- Reduces water penetration, minimizing freeze-thaw cycles
- Improves interlock of the pavers, increasing structural integrity
A poorly compacted paver base can lead to costly repairs, uneven surfaces, and safety hazards. With proper compaction at each stage—sub-base, base, bedding, and final paver set—you ensure the durability and aesthetic of your project.
Step 1: Gather Tools and Materials
Essential Tools:
- Plate compactor (vibratory, 200–500 lb range for most residential applications)
- Rake, shovel, and wheelbarrow
- Hand tamper (for tight corners)
- Level and straightedge
- Screed rails and screed board
- Rubber mat (for compacting pavers)
- Garden hose or water sprayer
Materials
- Sub-base material (crushed gravel or crushed stone)
- Base material (compacted aggregate)
- Bedding layer (sharp sand or washed concrete sand)
- Concrete or stone pavers
- Edge restraints (plastic or metal)
Step 2: Prepare the Subgrade
Beneath the paver project is the natural soil, or subgrade. Proper preparation of this layer is essential to avoid paver movement and unevenness.
Instructions:
- Excavate the site to the desired depth. For driveways, dig down 10–12 inches; for patios and walkways, 6–8 inches is typical.
- For drainage, make sure the slope is appropriate (1/4 inch per foot) away from structures.
- Remove debris, roots, and loose soil using a shovel and rake.
- Use a plate compactor to compact the subgrade in two to three passes, depending on soil type. Clay soils may require more passes and light water application.
Tip: Moistening the soil slightly helps the compactor produce better results. Avoid soaking it.
Step 3: Install the Sub-Base Layer
The sub-base is typically composed of crushed gravel or crushed stone with sharp edges that lock together when compacted.
Instructions:
- Apply the sub-base material in 2-3 inch layers.
- Rake and level the material to avoid dips and humps.
- Use the plate compactor to compact each layer thoroughly before adding the next.
- Repeat until you reach the recommended sub-base depth (4–6 inches for walkways, up to 8 inches for driveways).
Pro Tip: Run the plate compactor in a crisscross pattern—first north-south, then east-west—for uniform compaction.
Step 4: Install the Base Layer
Some installers use a separate base layer of finer aggregate or continue with the same sub-base material.
Instructions:
- Add a final 1–2 inch layer of base aggregate if needed.
- Level the surface using a long straightedge or screed board.
- Compact using the plate compactor in multiple passes to create a dense, flat base.
In order to hold the weight of pavers and traffic above, the base must be level, smooth, and sturdy.
Step 5: Set Screed Rails and Add Bedding Sand
The bedding layer allows pavers to sit evenly and lock in place.
Instructions:
- Lay screed rails (metal pipes or wooden boards) spaced apart slightly less than the width of your screed board.
- Pour sharp sand between the rails and level with the screed board by sliding it across the rails.
- Remove the rails and fill gaps with additional sand.
- Do NOT compact the sand layer yet—it must remain loose for the next step.
Thickness Tip: Bedding sand should be 1 inch deep when leveled.
Step 6: Lay the Pavers
Now it’s time to lay the pavers on the bedding layer.
Instructions:
- Start from a corner or straight edge and lay pavers in your chosen pattern.
- Place each paver gently—do not force it into the sand.
- Check alignment and spacing regularly to maintain a uniform appearance.
- Use a rubber mallet to tap pavers into place as needed.
Tip: Use spacers if your pavers are not self-spacing.
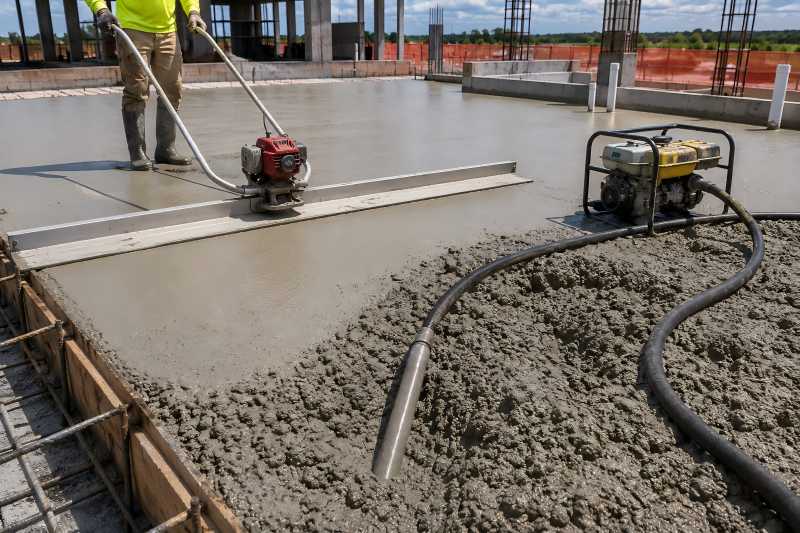
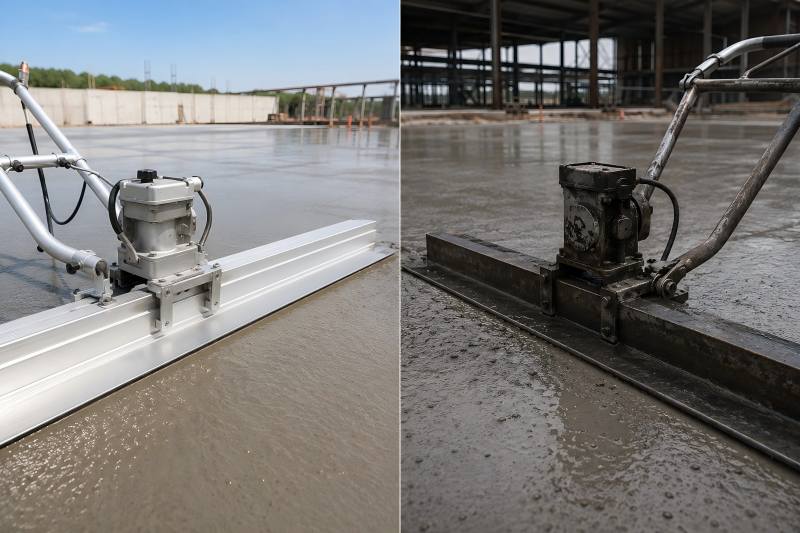
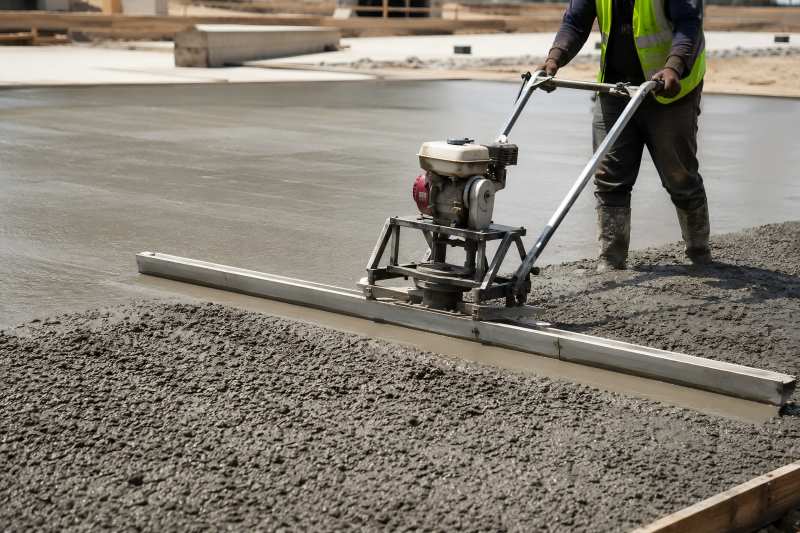
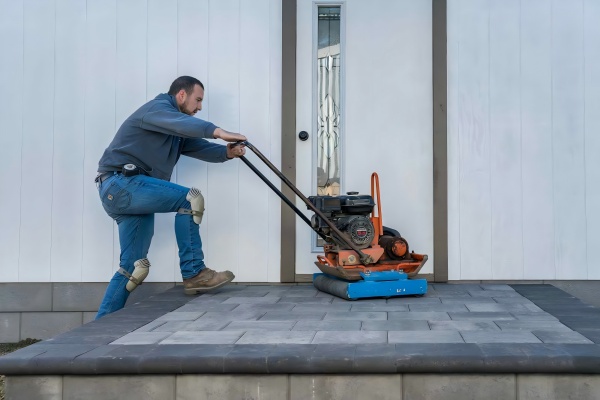
Step 7: Compact the Pavers (Initial Pass)
After all pavers are placed, it’s time for the initial compaction.
Instructions:
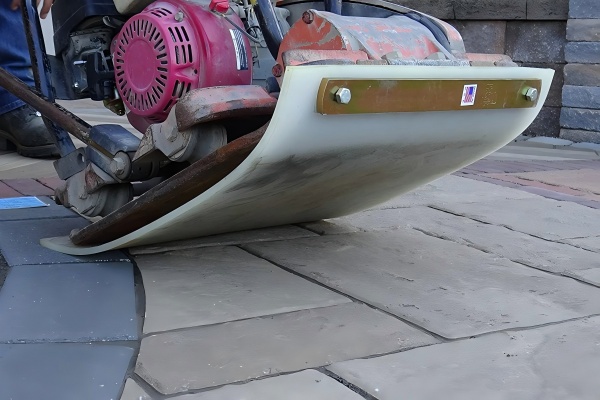
- Place a rubber pad or mat on the base of the plate compactor to avoid chipping the paver surface.
- Compact the surface in passes, covering the entire area in a crisscross pattern.
- Check for any uneven or sunken pavers and adjust them before proceeding to the final step.
This initial pass settles the pavers into the bedding sand and helps eliminate small gaps.
Step 8: Add Joint Sand
Joint sand fills the gaps between pavers, locking them together and preventing movement.
Instructions:
- Spread dry sand over the compacted pavers using a broom.
- Sweep the sand into the joints until all gaps are filled.
- To shake the sand further into the joints, use the plate compactor once more (with a rubber mat).
- Continue spreading and compacting the sand until all of the joints are filled and compacted.
Sand Type Tip: For improved joint stability and weed resistance, use polymeric sand. Just follow the manufacturer’s water activation steps afterward.
Step 9: Final Cleaning and Sealing (Optional)
- After compaction and joint sand application, do a final clean-up:
- Blow or sweep off excess sand.
- Hose off lightly if needed.
Consider sealing the pavers for color enhancement and protection from stains and weeds.
Safety and Operational Tips for Using a Plate Compactor
Wear safety gear: Eye protection, hearing protection, gloves, and steel-toe boots.
Check fuel and oil levels before operation.
Let the machine warm up before using it at full power.
Keep hands and feet clear of the plate during operation.
Always use a rubber mat when compacting pavers directly to avoid damage.
Common Mistakes to Avoid
- Skipping compaction of subgrade or base: Leads to paver settlement and unevenness.
- Compacting without a rubber mat: Chips and cracks paver surfaces.
- Overwatering bedding sand: Causes poor compaction and instability.
- Using too much or too little joint sand: Weakens the interlock and may lead to shifting.
Choosing the Right Plate Compactor for Pavers
As a manufacturer, we recommend selecting a compactor based on:
| Application Area | Recommended Compactor Weight | Plate Size | Engine Type |
| Small patios | 150–200 lbs | 14”–18” | Gasoline |
| Walkways | 200–300 lbs | 18”–20” | Gasoline |
| Driveways | 300–500 lbs | 20”–24” | Diesel |
| Commercial areas | 500+ lbs | 24”+ | Diesel |
Look for vibratory plate compactors with centrifugal force of 3,000–5,000 lbf and travel speeds of 20–30 m/min for optimal paver installation.
Using a plate compactor correctly in your paver installation ensures a long-lasting, level, and visually appealing surface. From preparing the subgrade to the final joint sand compaction, each step plays a critical role in overall success.
As a manufacturer of plate compactors, we emphasize investing in quality equipment and following the right process to achieve professional-grade results. Whether you’re installing a patio or a commercial driveway, the compactor is your foundation for quality.
If you’re looking for the best plate compactor for paver installation, feel free to contact our engineering team for expert advice tailored to your project size and soil conditions.