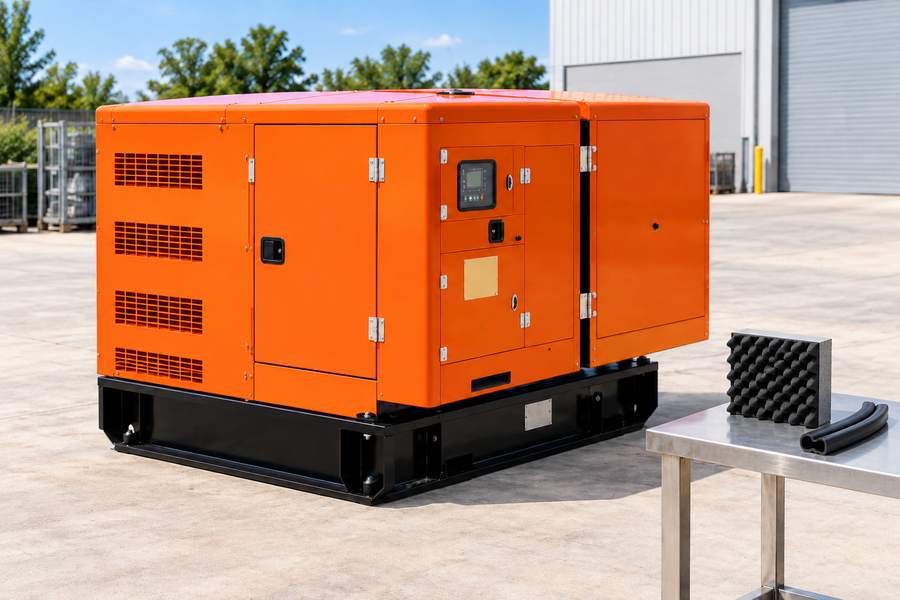
Inspect a silent diesel generator’s acoustic insulation and door seals with the machine stopped, isolated, and cooled, using the manufacturer’s enclosure instructions. Look for missing or detached lining, contamination, damaged seals, poor door alignment, loose fasteners, and blocked ventilation paths. The inspection must preserve the enclosure’s cooling and fire-safety design as well as its noise-reduction function.
Do not judge insulation quality only by thickness or softness. Material specification, placement, attachment, temperature suitability, and the surrounding enclosure design all matter. A neatly lined door is useful only when the complete generator retains its approved airflow, exhaust clearances, and service access.
Identify The Enclosure Configuration Before Inspection
Match the generator model and enclosure version to the service information. Ask for the relevant parts drawing and the manufacturer’s description of the lining and seals. Similar-looking canopies can use different materials and airflow arrangements.
Find out which panels are intended to open for routine inspection and which require service personnel. Some internal surfaces may be near hot exhaust components or electrical equipment. Do not remove additional panels simply because the fasteners are accessible.
Confirm the approved operating position of doors and access panels. Noise performance may depend on their being closed, and cooling may depend on specific partitions or seals. The inspection should verify the intended arrangement rather than create a new one.
Excalibur’s silent diesel generator configurations use enclosures and other noise-reduction features. Request the material and maintenance details for the exact model. A general statement that a canopy is soundproof does not identify the lining’s specification or replacement procedure.
Prepare The Machine For Safe Access
Shut down the generator and follow the procedure that prevents unexpected starting. Include automatic and remote-start functions where fitted. Allow hot components to cool before working near the enclosure lining or exhaust area.
Use suitable lighting so the edges, joints, and lower sections of the enclosure can be seen clearly. Keep the inspection area clean and avoid dropping tools or loose material into the machine. Do not reach past guards toward components that have not been made safe.
Open doors using their intended handles and supports. Check whether stays or restraints are fitted and functioning before placing yourself in the opening. A heavy door that moves unexpectedly can damage seals or injure the person inspecting it.
Document the starting condition with photographs where useful. Include a wider view that identifies the panel and a close view of any defect. This is more informative than an isolated photograph of foam with no indication of where it belongs.
Inspect Lining Coverage And Attachment
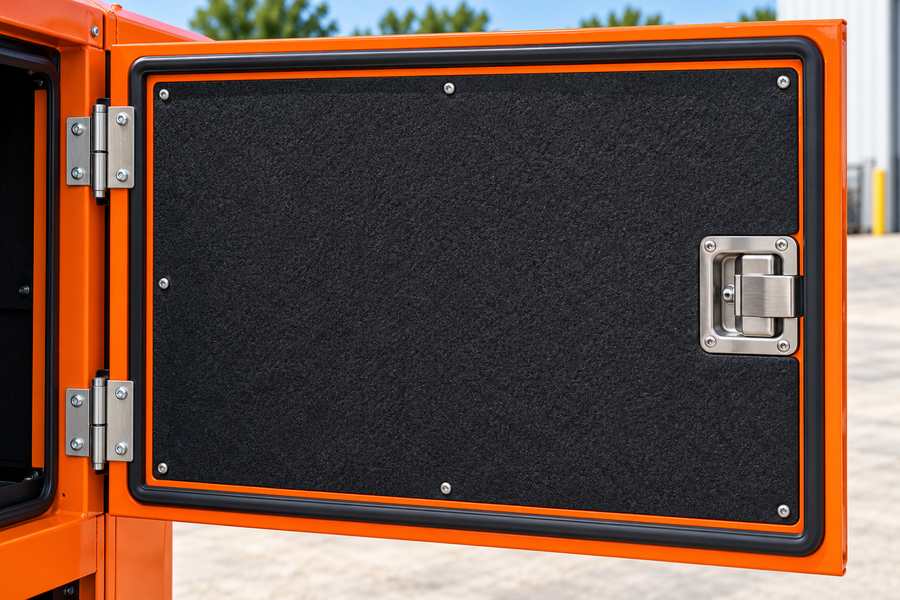
Compare the visible lining with the parts information or an approved reference configuration. Look for missing sections, gaps where material has come away, torn edges, or areas hanging loose. Do not assume every unlined surface is defective; some clearances may be intentional.
Check the attachment method described by the manufacturer. Adhesive, mechanical retention, facings, or combinations may be used. A repair should restore the specified method rather than rely on an arbitrary glue that happens to hold initially.
Pay attention to edges near doors, service openings, and ventilation paths. These areas may experience repeated contact or airflow. Detached material can obstruct cooling passages or contact components that it was intended to remain clear of.
Do not pull firmly on apparently sound lining as an improvised adhesion test. The manufacturer may specify an inspection method, and unnecessary force can create damage. Record visible defects and refer uncertain attachment conditions for assessment.
Look For Fuel, Oil, Water, And Heat Damage
Inspect for staining, saturation, unusual odor, swelling, crumbling, or deterioration. Have saturated material assessed for replacement while tracing the leak that wetted it; fitting a new liner beneath an unresolved leak repeats the problem. Cleaning the surface without fixing a leak can leave the same problem recurring.
Check lower sections where water or leaked fluids could collect. Also examine material near service points where spills may occur. Ask which cleaning methods are permitted for the lining and its facing; aggressive solvents or soaking may damage the material or attachment.
Discoloration, charring, melting, or brittle areas near hot components require investigation. Do not cover the damaged section with another layer and return the generator to service. The underlying clearance, exhaust, or thermal problem needs assessment.
Flag suspected combustion or exhaust exposure separately in the repair notes so it receives the appropriate technical investigation. A cosmetic replacement does not establish that the cause has been corrected. Obtain the manufacturer’s repair requirements before normal operation resumes.
Verify Material Suitability Before Replacement
Request the approved replacement part or material specification. Temperature capability, fire behavior, resistance to the expected environment, acoustic function, and attachment compatibility can all be relevant. A material marketed for a room, vehicle interior, or recording studio is not automatically suitable inside a generator enclosure.
Ask for evidence supporting any stated material performance. The information should identify the actual product and applicable test conditions. Broad terms such as flameproof or industrial grade are not enough to select a substitute.
Do not assume that thicker material provides a better repair. Extra thickness can reduce clearances, interfere with door closure, or restrict airflow. It may also change the way the enclosure behaves acoustically without delivering the expected benefit.
Use the specified adhesive or retention system and installation procedure. Surface preparation and curing conditions may matter. Keep repair products and offcuts out of the generator, and verify that the repaired assembly is ready for service under the manufacturer’s instructions.
Inspect Door Seals Along Their Full Length
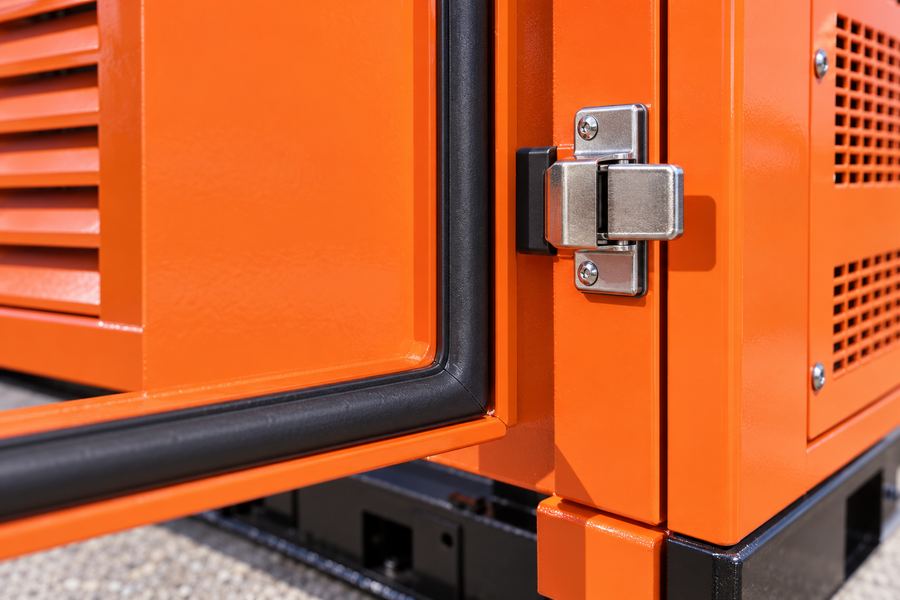
Check each seal for cuts, missing sections, compression damage, hardening, detachment, or displaced corners. Follow the full perimeter rather than inspecting only the area beside the latch. A small gap can create an unwanted sound path or affect the intended enclosure airflow.
Identify the seal profile and where it is meant to contact the mating surface. A generic strip of similar thickness may not provide the same fit or durability. Request the correct part and installation orientation.
Look for dirt, paint buildup, damaged edges, or trapped objects on the contact surface. A sound gasket cannot make continuous contact across a distorted or obstructed mating surface. Restore that contact surface through the enclosure supplier’s specified cleaning or repair procedure.
Do not add layers of household weatherstrip to force a tight fit. This can overload the latch, distort the door, and create uneven contact. Correct the door alignment or damaged contact surface as necessary, then verify the fit with the approved gasket profile.
Check Hinges, Latches, And Door Alignment
A damaged hinge or loose latch can make a sound seal appear defective. Inspect attachment points, visible wear, and the way the door approaches the frame. The door should close as intended without being forced against nearby components.
Ask how seal compression and latch adjustment are checked on the model. Do not assume that tightening the latch as far as possible improves noise control. Excessive compression can damage a seal or distort the surrounding structure.
Look for signs that the door has been struck or used as a support. A bent panel can leave gaps that a new seal cannot correct. Record the panel condition before ordering replacement sealing material.
After approved adjustment or repair, verify the door’s operation through its normal travel. Check that stays, hinges, latches, and seals work together. Keep fingers clear of closing edges and do not use an improvised live-noise test to judge the fit.
Preserve Ventilation And Exhaust Clearances
Inspect the lining around air inlets, outlets, ducts, and internal partitions. Confirm that no material has shifted into the flow path. Acoustic treatment is part of the cooling design and should not be installed across openings simply to reduce audible noise.
Check the specified clearance from exhaust components and other hot surfaces. The presence of insulation elsewhere in the enclosure does not authorize wrapping a pipe or silencer. Exhaust insulation, where used, requires its own approved materials and arrangement.
Do not seal every visible opening. Some gaps or passages may be intentional for ventilation, drainage, or service functions. Compare the condition with the manufacturer’s design before deciding that an opening is a defect.
If noise has increased after a repair, consider whether a panel, duct, seal, or fastener was omitted or installed incorrectly. Restore the approved arrangement rather than adding more material at random. Keep the engine cooling and exhaust requirements central to the repair.
Separate Acoustic Defects From Other Noise Sources
Loose hardware, damaged vibration mounts, exhaust leaks, and mechanical faults can produce noise that insulation replacement will not solve. Record where the sound appears to originate and when it occurs. Have the generator inspected appropriately rather than assuming every noise increase comes from worn foam.
A panel rattle may change with load or temperature, while an exhaust leak may require a different repair entirely. Do not approach running hot components or open guarded areas to locate a sound. Use the manufacturer’s diagnostic procedure and qualified personnel where necessary.
For a useful before-and-after noise comparison, retain the same load, microphone positions, and other specified test conditions. A phone recording made at a different distance cannot establish the amount of improvement. Where a contractual noise requirement applies, follow the agreed test method.
| Inspection area | Finding to record | Follow-up |
| Lining attachment | Loose edges, missing sections, or sagging material | Approved repair and airflow inspection |
| Material condition | Fluid saturation, heat damage, or deterioration | Identify cause and assess replacement |
| Door seals | Cuts, displaced corners, hardening, or poor contact | Correct profile and fit verification |
| Door hardware | Loose hinges, damaged latches, or distortion | Repair before judging seal performance |
| Ventilation paths | Blocked openings or displaced partitions | Restore the specified enclosure arrangement |
Keep An Enclosure Maintenance Record
For incoming inspection, compare corresponding doors on the approved sample and delivered machine. Check the lining layout, seal profile, hardware, and visible ventilation clearances. Photograph any difference and ask whether it is an approved revision before accepting a substitute material or arrangement.
For an older machine, compare the defect with previous inspection photographs. A growing stain beneath a service point suggests a different follow-up from a clean tear at a frequently opened door edge. The history can help determine whether the repair should focus on fluid control, handling, alignment, or material deterioration.
Keep a small stock of the correct service parts where downtime matters, but store them according to their instructions. Adhesives and sealing materials may have storage or shelf-life limits, and a part that has deteriorated in a hot store is not a reliable replacement. Record the product identity when a repair is made so future inspections are not complicated by an unknown material.
Record the inspection date, operating hours, panel location, defect, repair material, and person completing the work. Retain photographs of significant findings and the approved replacement information. This helps identify recurring leaks, vibration damage, or attachment failures.
When comparing diesel generator options, include replacement seals, lining parts, and enclosure service information in the support discussion. Noise-reduction components need to remain serviceable throughout ownership. Ask how those parts are supplied for the selected model.
Before returning the generator to use, confirm that doors, guards, latches, seals, and internal airflow components are correctly restored and that tools and loose material have been removed. Resolve heat or fluid damage at its source. A successful inspection leaves the enclosure functioning as designed, rather than merely looking newly lined.